

wic.support
-
Content Count
472 -
Joined
-
Last visited
-
Days Won
29
Posts posted by wic.support
-
-
1. Just download latest official firmware from the Epson website and install it the same way.
2. You can reinstall chipless firmware and then you will need to either activate it again using same key as before or to use recovery key that you saved during previous activation.
-
 1
1
-
-
Good day. Did you have recognized ink cartridges during update process? Your screenshot is shown ink out error. This model will not accept new firmware correctly in the normal mode if printer is not able to print.
-
Good day. Please, post screenshot with the error and selected function clearly visible.
I/F stands for interface, check that USB connection is actually enabled in the printer settings (see User Manual for details).
-
Good day. 10091 means that application could not connect to the server. Please, check if you have the access:
1. Enable telnet client in the windows components.
2. In the command line type telnet 211.159.168.205 20102
If you get empty screen with input prompt it means that server is available system wide and something is blocking license.exe specifically.
If you get any error this means that either this IP/port blocked locally for the entire system or on the router/provider side or server is currently not available.
I also checked it right now and server is working.
-
Good day. Please, try this version:
https://www.chiplesssolutions.com/download/chipless/XP452_FWH316TL_MM10I8_MM99Z9.zip
-
Post a screenshot from WIC with the current firmware version. Also, if you send me contact information in PM (skype, telegram) I can connect to you remotely and check myself.
-
Make sure that you are using correct version of the firmware:
https://www.chiplesssolutions.com/download/chipless/XP214_FWG825TL_OD26I6_OD99Z9.zip
you need to update printer in the normal mode and ink cartridges must be installed and recognized during update:
if it is not possible you need to use this method:
https://forum.2manuals.com/index.php?/topic/80708-updating-firmware-using-recovery-mode/
after update is complete, install WIC and check current version using `report` button, it must be OD26I6. After this disable all epson applications (select `support >> disable processes` in the WIC menu) and try to activate again.
-
Good day. This is supposed to happen, please carefully read this topic:
and check current firmware version, if it matches chipless one (FM10I8) try to activate it.
-
-
@xemoterp, please, try this:
www.chiplesssolutions.com/download/updates/license-09-02-2020.zip
and write about the results in this topic.
-
If you have a printer that should be supported by WICReset according to the list of the supported models in the application:
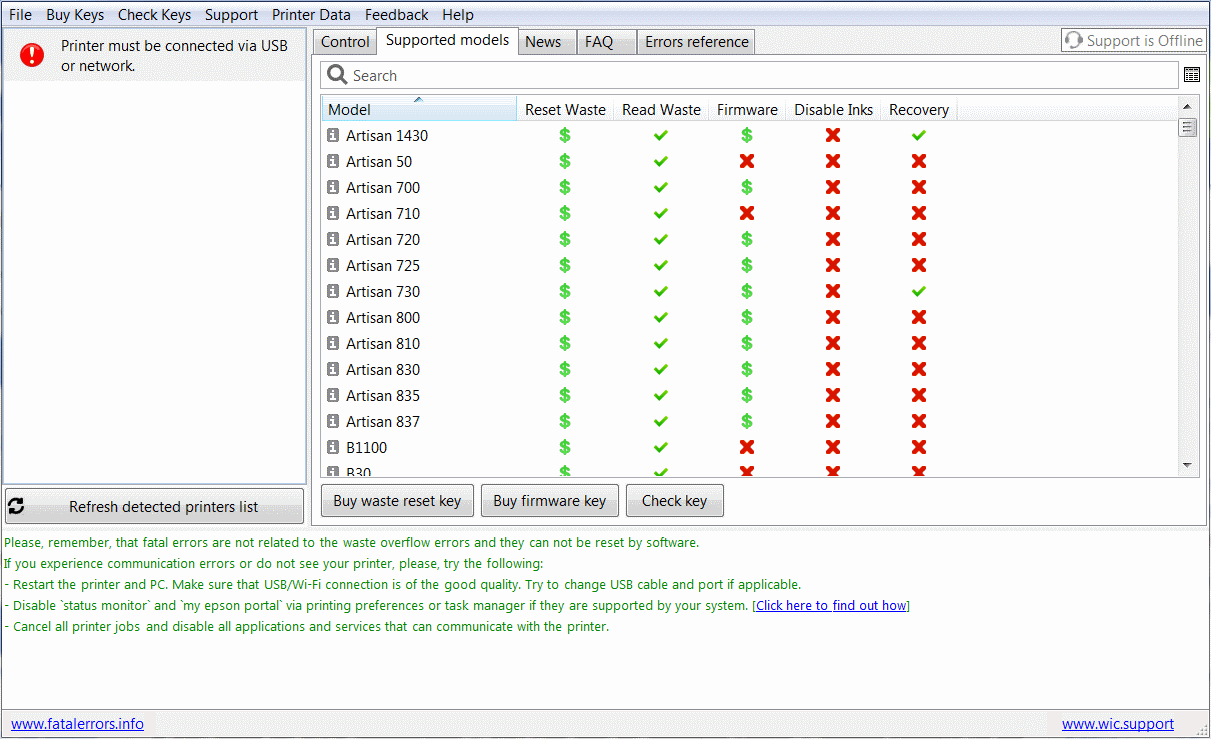
but it is not recognized when you connect it to the program:
please, post in this topic a screenshot of the application that has this printer connected and clearly visible along with the model name that is written on the printer`s cover. Both the screenshot and the model from the cover MUST be included.
-
Good day. If you send me a way to contact you (skype or telegram) in private message, I can connect to you remotely and try to fix it. Unfortunately, it`s not clear from your post what exactly did you do and what exactly happened.
-
Good day. Did you tried this:
Please, install latest official version of the firmware, then replace/reset maintenance box and make sure that it is recognized by the printer, after this install chipless firmware (firmware with disabled ink cartridges) back. You have to use new Firmware Key.
-
I see, according to the service manual 0Dxxxxxx errors is "An error code for debugging", which means that they should not happen after printer is shipped to customer, so probably either EEPROM or firmware is corrupted, unfortunately, I never encountered this myself and do not have specific advice, but service manual recommends to reflush printer firmware. Also, you need to ask this person, what exactly she did.
-
This message means that entered string has incorrect format and it's not a key. Please, make sure that you entered all symbols correctly and did not use transaction id/reference number or similiar instead. Correct CS key must look like this: XXXXX-XXXXX-XXXXX-XXXXX-XXXXX
-
Good day. Please, describe the whole process with as much details as possible, what is your operating system? What exactly this person done? What did you do and when exactly you get this error? Also, please, add screenshots, including one with this error. Lastly, I can connect to you remotely and try to solve this myself.
-
Also make sure that USB connection is not disabled on the printer in the settings:
1. Press the home button, if necessary.
2. Select Settings.
3. Select General Settings.
4. Select Printer Settings.
5. Scroll down and select PC Connection via USB.
6. Select Enable. -
Please, install latest official version of the firmware, then replace/reset maintenance box and make sure that it is recognized by the printer, after this install chipless firmware back and reactivate it using recovery code.
-
OS is operating system, what version of the windows do you have?
"It don't connect with my Epson. " please, describe what exactly is happening with screenshots, also what are you trying to accomplish?
-
Good day
Is printer driver installed in the system and connected with correct virtual USB port? Application can only see installed printers, also you need to disconnect any other printers you may have.
What OS you are using? Make sure that you run the program in compatibility mode with XP and it has administrative rights.
-
Good day.
Did you reupload chipless firmware back to the printer again after update from epson?
What is the current version? You can check it in the printer settings or via WIC using `report` button.
-
1
-
-
Printer`s firmware must be updated in the normal mode via USB, if you are disabled USB and unable to reach printer`s settings, you need to temporarily install original cartridges.
-
Update process consists of two steps, first application send firmware data to the printer and signal that transfer is finished, then printer shutdown all communication and start internal update, at this point it`s impossile to check the results. Recently Epson started to block older versions of the firmware with their updates, after checking firmware signature printer just refuses to write data to the chip. If you send me key via PM, I will restore it. After this, you have two options, either use WIC key again with this method that may or may not work:
or replace WIC key with CS key after paying the difference.
-
 1
1
-
-
Please, check current firmware version using `report` button in WIC, for chipless firmware it must be AT12GC.
Model Availability Chipless Solutions
in Chipless Requests
Posted · Report reply
Chipless firmware is not available for XP-8xxx XP-610x XP-510x WF-4740 WF-28xx, cartridge numbers do not matter in this case, only firmware serie.
As for WF-2865 WF-4725DWF and WF-4730DTWF, I suspect that their internal model and firmware ID is identical to those, that we have, if possible, check real model name as shown in the WICReset and post it there.